 |
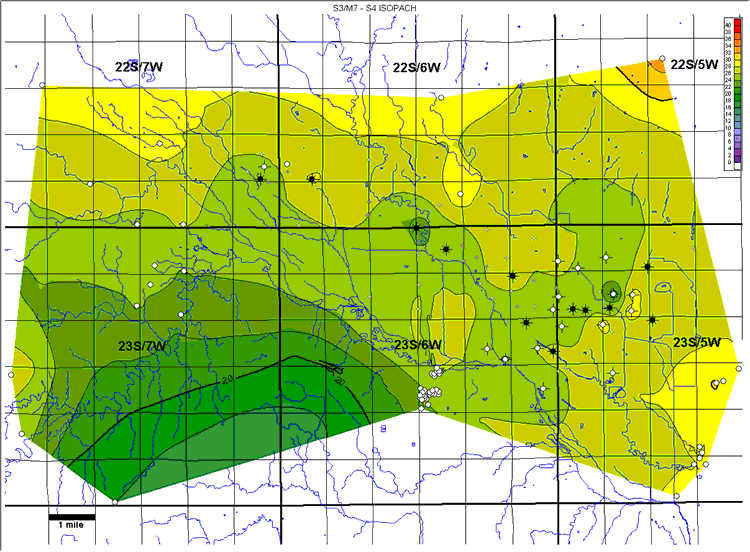
| Figure 4A. Isopach map of the interval between markers S3/M7 and S4.
Contour interval = 2 ft. |
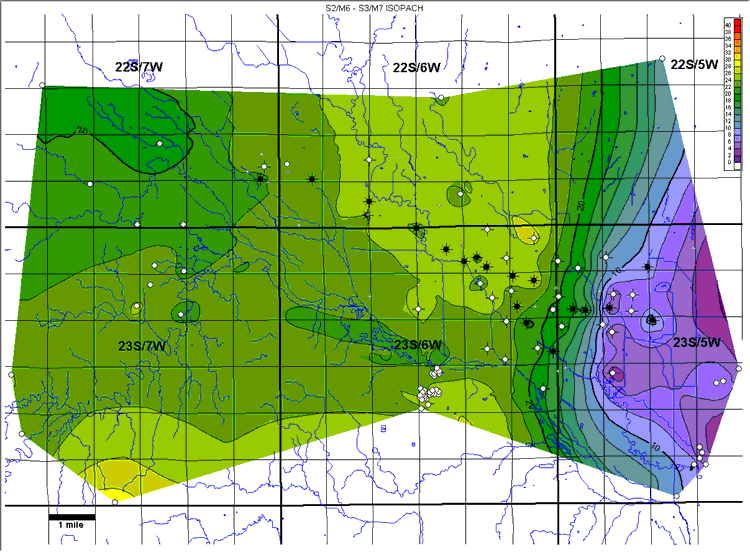 |
| Figure 4B. Isopach map of the interval between markers S2/M6 and S3/M7.
Contour interval = 2 ft. |
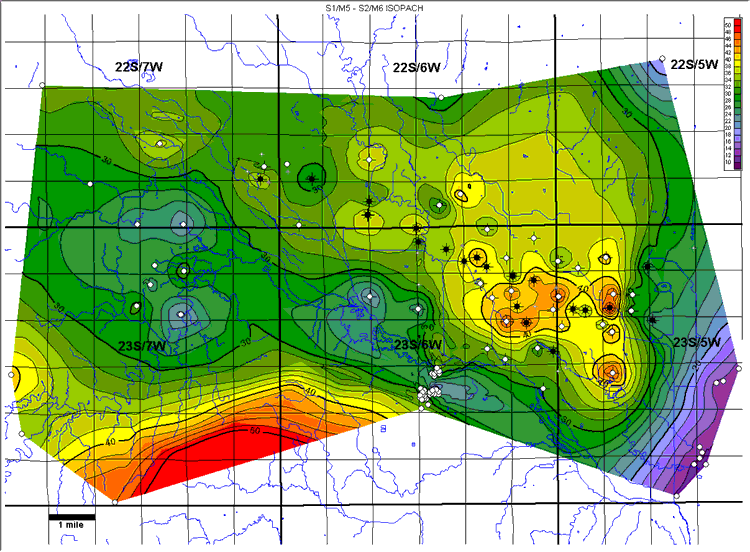 |
| Figure 4C. Isopach map of the interval between markers S1/M5 and S2/M6.
Contour interval = 2 ft. |
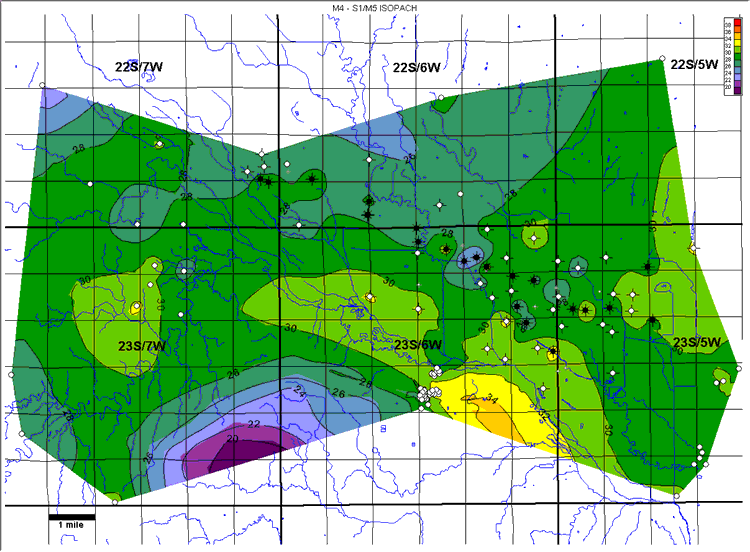 |
| Figure 4D. Isopach map of the interval between markers M4 and S1/M5.
Contour interval = 2 ft. |
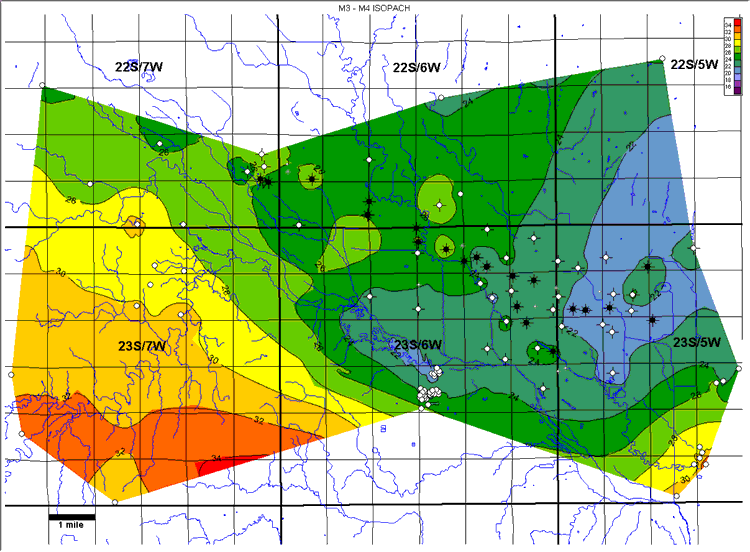 |
| Figure 4E. Isopach map of the interval between markers M3 and M4. Contour
interval = 2 ft. |
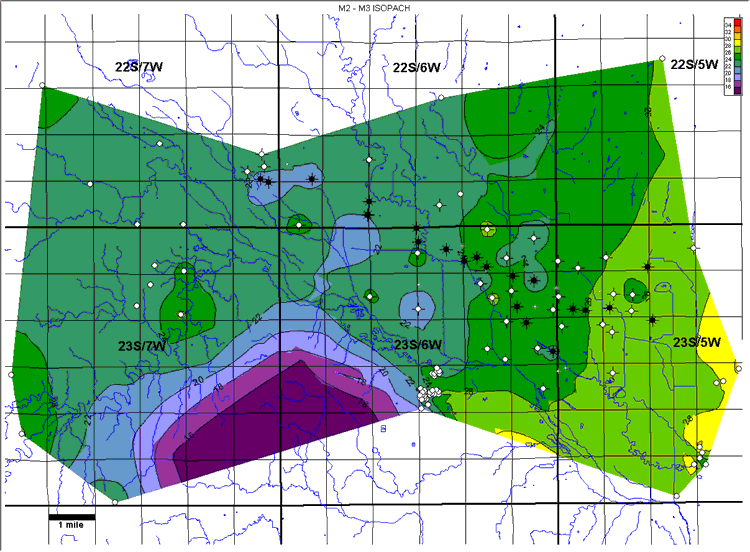 |
| Figure 4F. Isopach map of the interval between markers M2 and M3. Contour
interval = 2 ft. |
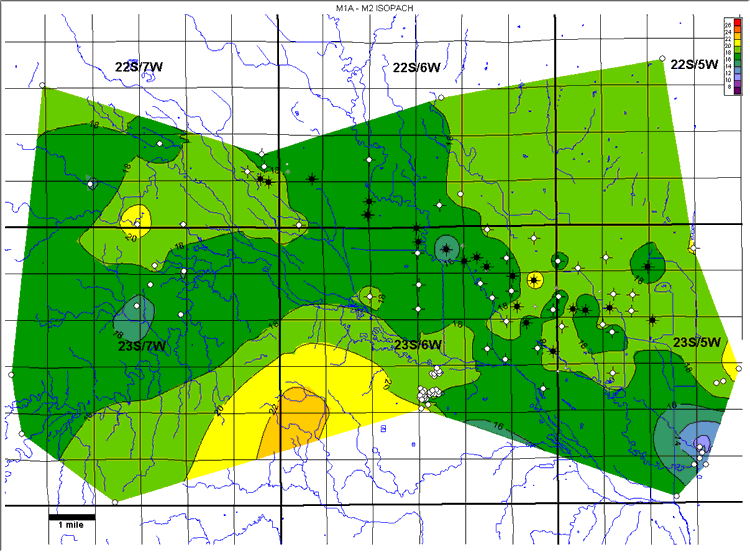 |
| Figure 4G. Isopach map of the interval between markers M1A and M2. Contour
interval = 2 ft. |
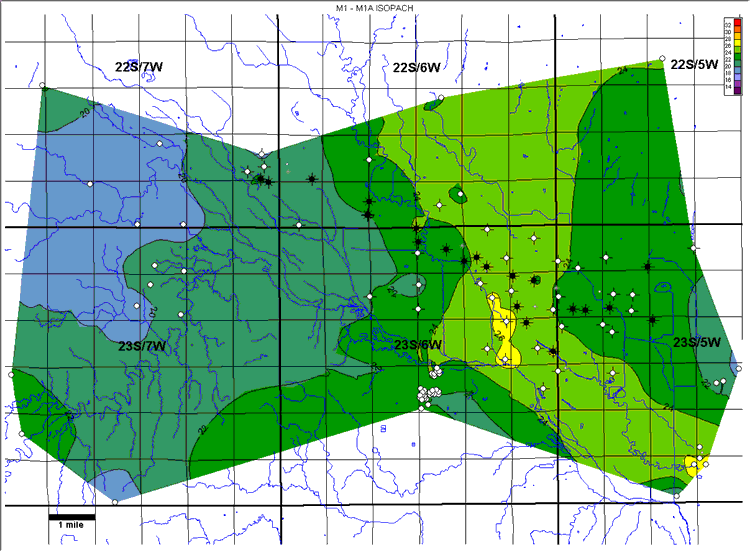 |
| Figure 4H. Isopach map of the interval between markers M1 and M1A. Contour
interval = 2 ft. |
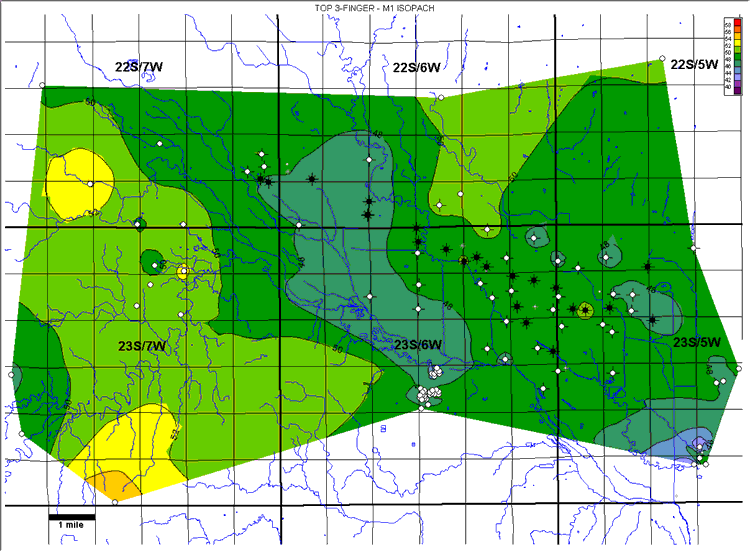 |
| Figure 4I. Isopach map of the interval between the top 3-finger dolomite
and marker M1. Contour interval = 2 ft. |
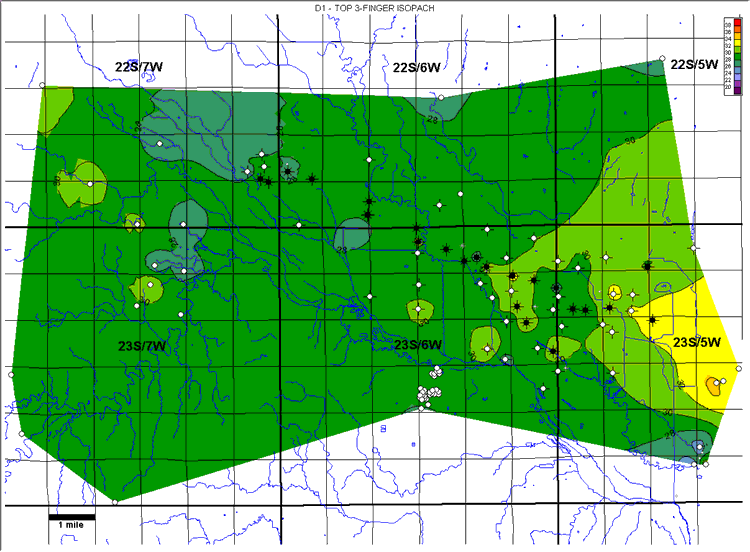 |
| Figure 4J. Isopach map of the interval between marker D1 and the top
3-finger dolomite. Contour interval = 2 ft. |
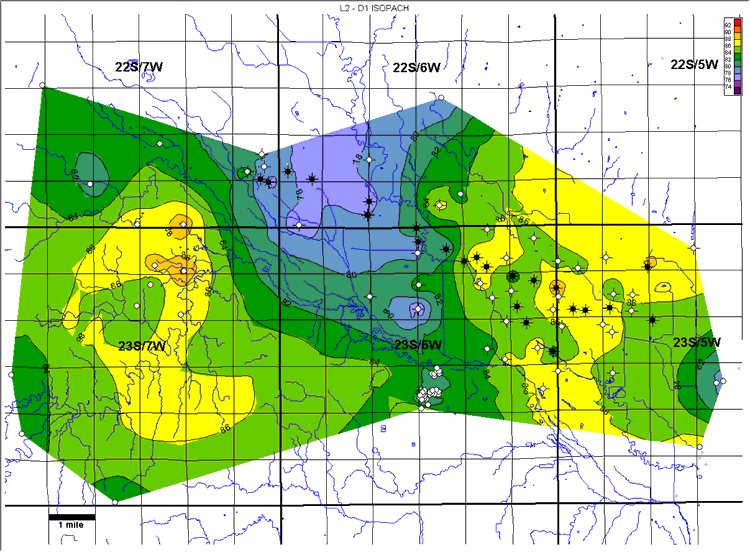 |
| Figure 4K. Isopach map of the interval between markers L2 and D1. Contour
interval = 2 ft. |
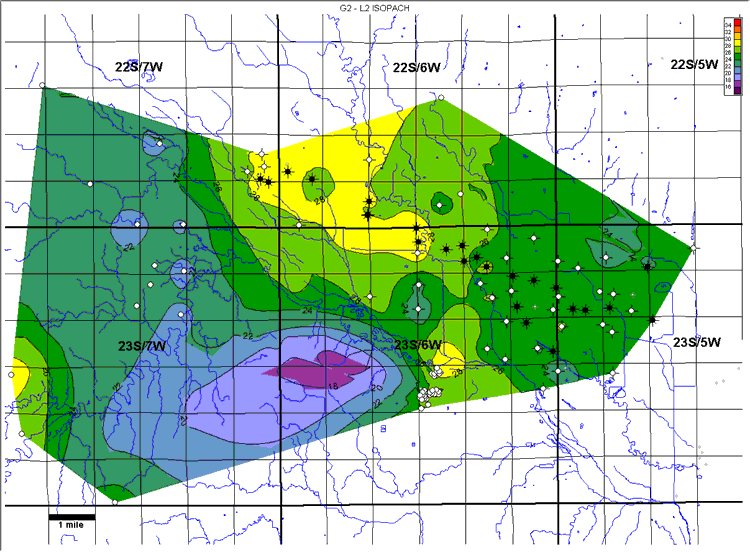 |
| Figure 4L. Isopach map of the interval between markers G2 and L2. Contour
interval = 2 ft. |
Wells within the study area not used in generating these maps are displayed
in gray at half size.
